[CloudNeta] EKS 워크샵 스터디 (3) - EKS Scaling Part 3 - Node 스케일링 (CAS, Karpenter, Fargate)
이번 게시글에서는 EKS 워크샵 스터디 제 3주차 내용을 작성합니다.
이 글은 3부로 나누어집니다.
CAS - Cluster Autoscaler
Part 2에서 다룬 HPA/KEDA/CPA는 Pod를 늘리는 오토스케일러입니다. 하지만 Pod를 아무리 늘려봐야, 노드에 빈 자리가 없으면 Pending 상태로 멈춥니다.
Cluster Autoscaler(CAS) 는 이 문제를 해결합니다. 노드 자체를 자동으로 늘리고 줄이는 오토스케일러입니다.
CAS란?
CAS는 클러스터 내에 Deployment로 배포되는 컴포넌트로, 다음 두 가지 조건을 감시합니다.
- 스케일 아웃: 리소스 부족으로 Pending 상태인 Pod가 존재할 때 → 워커 노드 추가
- 스케일 인: 일정 시간 동안 사용률이 낮은 노드가 있고, 해당 노드의 Pod를 다른 노드로 옮길 수 있을 때 → 워커 노드 제거
AWS에서는 EC2 Auto Scaling Group(ASG) 을 통해 노드를 관리합니다. CAS가 "노드가 필요하다"고 판단하면 ASG의 Desired Capacity를 올려서 EC2 인스턴스를 추가합니다.
동작 흐름
flowchart LR
    A[Pod 생성 요청] --> B{노드에 빈 자리 있음?}
    B -- Yes --> C[스케줄링 성공]
    B -- No --> D[Pod: Pending 상태]
    D --> E[CAS가 Pending 감지]
    E --> F[ASG Desired Capacity 증가]
    F --> G[새 EC2 노드 Join]
    G --> C
스케일 인 조건
CAS는 주기적으로 노드 사용률을 확인합니다. 아래 조건이 모두 충족되면 스케일 인을 수행합니다.
- 노드의 리소스 사용률(request 기준)이 임계값 이하
- 해당 노드의 모든 Pod가 다른 노드로 이동 가능
- PDB(PodDisruptionBudget)를 위반하지 않음
- 일정 시간(기본 10분) 동안 위 조건이 유지됨
실습
CAS 설정 확인해보기
AWS용 Cluster Autoscaler는 Auto Scaling Group과 연동되며, 4가지 배포 방식을 지원합니다.
| 배포 방식 | 설명 |
|---|---|
| 단일 ASG | ASG 1개만 관리 |
| 복수 ASG | 여러 ASG를 명시적으로 지정 |
| Auto-Discovery (권장) | 태그 기반으로 ASG를 자동 발견. 공식문서 참고 |
| Control-plane Node 설정 | Control Plane 노드에 직접 구성 |
CAS는 ASG의 Launch Configuration 또는 Launch Template에 지정된 인스턴스 타입을 기반으로 CPU, Memory, GPU 리소스를 파악합니다.
이번 실습에서는 권장 방식인 Auto-Discovery를 사용합니다. CAS는 --node-group-auto-discovery 플래그로 어떤 ASG를 관리할지 결정하는데, ASG에 k8s.io/cluster-autoscaler/enabled와 k8s.io/cluster-autoscaler/<cluster-name> 태그가 붙어있어야 CAS가 해당 ASG를 자동으로 찾아서 스케일링 대상으로 인식합니다. 이 태그가 없으면 CAS가 ASG를 발견하지 못하므로, 실습 전에 태그가 제대로 붙어있는지 확인합니다.
# 아래 두 값을 확인합니다.
$ aws ec2 describe-instances  --filters Name=tag:Name,Values=myeks-ng-1 --query "Reservations[*].Instances[*].Tags[*]" --output json | jq
[
  ...
      {
        "Key": "k8s.io/cluster-autoscaler/enabled",
        "Value": "true"
      },
      {
        "Key": "kubernetes.io/cluster/myeks",
        "Value": "owned"
      }
    ]
  ]
]
이어서 아래 값을 살펴보시죠.
# 현재 autoscaling(ASG) 정보를 확인합니다.
$ aws autoscaling describe-auto-scaling-groups \
    --query "AutoScalingGroups[? Tags[? (Key=='eks:cluster-name') && Value=='myeks']].[AutoScalingGroupName, MinSize, MaxSize,DesiredCapacity]" \
    --output table
------------------------------------------------------------------------
|                       DescribeAutoScalingGroups                      |
+-------------------------------------------------------+----+----+----+
|  eks-myeks-ng-1-3ccea4c9-49e6-0272-6401-aca31051d91b  |  1 |  4 |  2 |
+-------------------------------------------------------+----+----+----+

# maxSize를 6으로 바꾸고
export ASG_NAME=$(aws autoscaling describe-auto-scaling-groups --query "AutoScalingGroups[? Tags[? (Key=='eks:cluster-name') && Value=='myeks']].AutoScalingGroupName" --output text)
aws autoscaling update-auto-scaling-group --auto-scaling-group-name ${ASG_NAME} --min-size 3 --desired-capacity 3 --max-size 6

# 재조정이 확인됩니다.
aws autoscaling describe-auto-scaling-groups --query "AutoScalingGroups[? Tags[? (Key=='eks:cluster-name') && Value=='myeks']].[AutoScalingGroupName, MinSize, MaxSize,DesiredCapacity]" --output table
------------------------------------------------------------------------
|                       DescribeAutoScalingGroups                      |
+-------------------------------------------------------+----+----+----+
|  eks-myeks-ng-1-3ccea4c9-49e6-0272-6401-aca31051d91b  |  3 |  6 |  3 |
+-------------------------------------------------------+----+----+----+
CAS를 본격적으로 배포해보고 확인합시다.
# CAS 예시값을 다운로드받고
$ curl -s -O https://raw.githubusercontent.com/kubernetes/autoscaler/master/cluster-autoscaler/cloudprovider/aws/examples/cluster-autoscaler-autodiscover.yaml

# 클러스터명을 테스트명으로 바꾼 후
$ sed -i -e "s|<YOUR CLUSTER NAME>|myeks|g" cluster-autoscaler-autodiscover.yaml

# 배포합시다.
$ k apply -f cluster-autoscaler-autodiscover.yaml
serviceaccount/cluster-autoscaler created
clusterrole.rbac.authorization.k8s.io/cluster-autoscaler created
role.rbac.authorization.k8s.io/cluster-autoscaler created
clusterrolebinding.rbac.authorization.k8s.io/cluster-autoscaler created
rolebinding.rbac.authorization.k8s.io/cluster-autoscaler created
deployment.apps/cluster-autoscaler created

# CAS 설정이 되어있음을 확인할 수 있습니다.
$ k get pod -n kube-system | grep cluster-autoscale
cluster-autoscaler-7dcb5569d5-8pds4             1/1     Running   0          15s

$ k describe deployments.apps -n kube-system cluster-autoscaler
Name:                   cluster-autoscaler
Namespace:              kube-system
CreationTimestamp:      Thu, 02 Apr 2026 17:35:18 +0900
Labels:                 app=cluster-autoscaler
Annotations:            deployment.kubernetes.io/revision: 1
Selector:               app=cluster-autoscaler
Replicas:               1 desired | 1 updated | 1 total | 1 available | 0 unavailable
StrategyType:           RollingUpdate
MinReadySeconds:        0
RollingUpdateStrategy:  25% max unavailable, 25% max surge
Pod Template:
  Labels:           app=cluster-autoscaler
  Annotations:      prometheus.io/port: 8085
                    prometheus.io/scrape: true
  Service Account:  cluster-autoscaler
  Containers:
   cluster-autoscaler:
    Image:      registry.k8s.io/autoscaling/cluster-autoscaler:v1.32.1
    Port:       <none>
    Host Port:  <none>
    Command:
      ./cluster-autoscaler
      --v=4
      --stderrthreshold=info
      --cloud-provider=aws
      --skip-nodes-with-local-storage=false
      --expander=least-waste
      --node-group-auto-discovery=asg:tag=k8s.io/cluster-autoscaler/enabled,k8s.io/cluster-autoscaler/myeks
    Limits:
      cpu:     100m
      memory:  600Mi
    Requests:
      cpu:        100m
      memory:     600Mi
    Environment:  <none>
    Mounts:
      /etc/ssl/certs/ca-certificates.crt from ssl-certs (ro)
  Volumes:
   ssl-certs:
    Type:               HostPath (bare host directory volume)
    Path:               /etc/ssl/certs/ca-bundle.crt
    HostPathType:
  Priority Class Name:  system-cluster-critical
  Node-Selectors:       <none>
  Tolerations:          <none>
Conditions:
  Type           Status  Reason
  ----           ------  ------
  Available      True    MinimumReplicasAvailable
  Progressing    True    NewReplicaSetAvailable
OldReplicaSets:  <none>
NewReplicaSet:   cluster-autoscaler-7dcb5569d5 (1/1 replicas created)
Events:
  Type    Reason             Age   From                   Message
  ----    ------             ----  ----                   -------
  Normal  ScalingReplicaSet  19s   deployment-controller  Scaled up replica set cluster-autoscaler-7dcb5569d5 from 0 to 1

$ k describe deployments.apps -n kube-system cluster-autoscaler | grep node-group-auto-discovery
      --node-group-auto-discovery=asg:tag=k8s.io/cluster-autoscaler/enabled,k8s.io/cluster-autoscaler/myeks

# cluster-autoscaler 파드가 동작하는 워커 노드가 퇴출(evict) 되지 않게 설정합니다.
$ k -n kube-system annotate deployment.apps/cluster-autoscaler cluster-autoscaler.kubernetes.io/safe-to-evict="false"
deployment.apps/cluster-autoscaler annotated
모니터링 및 스케일 여부 확인하기
모니터링을 위해 3개의 쉘을 각각 띄워둡시다.
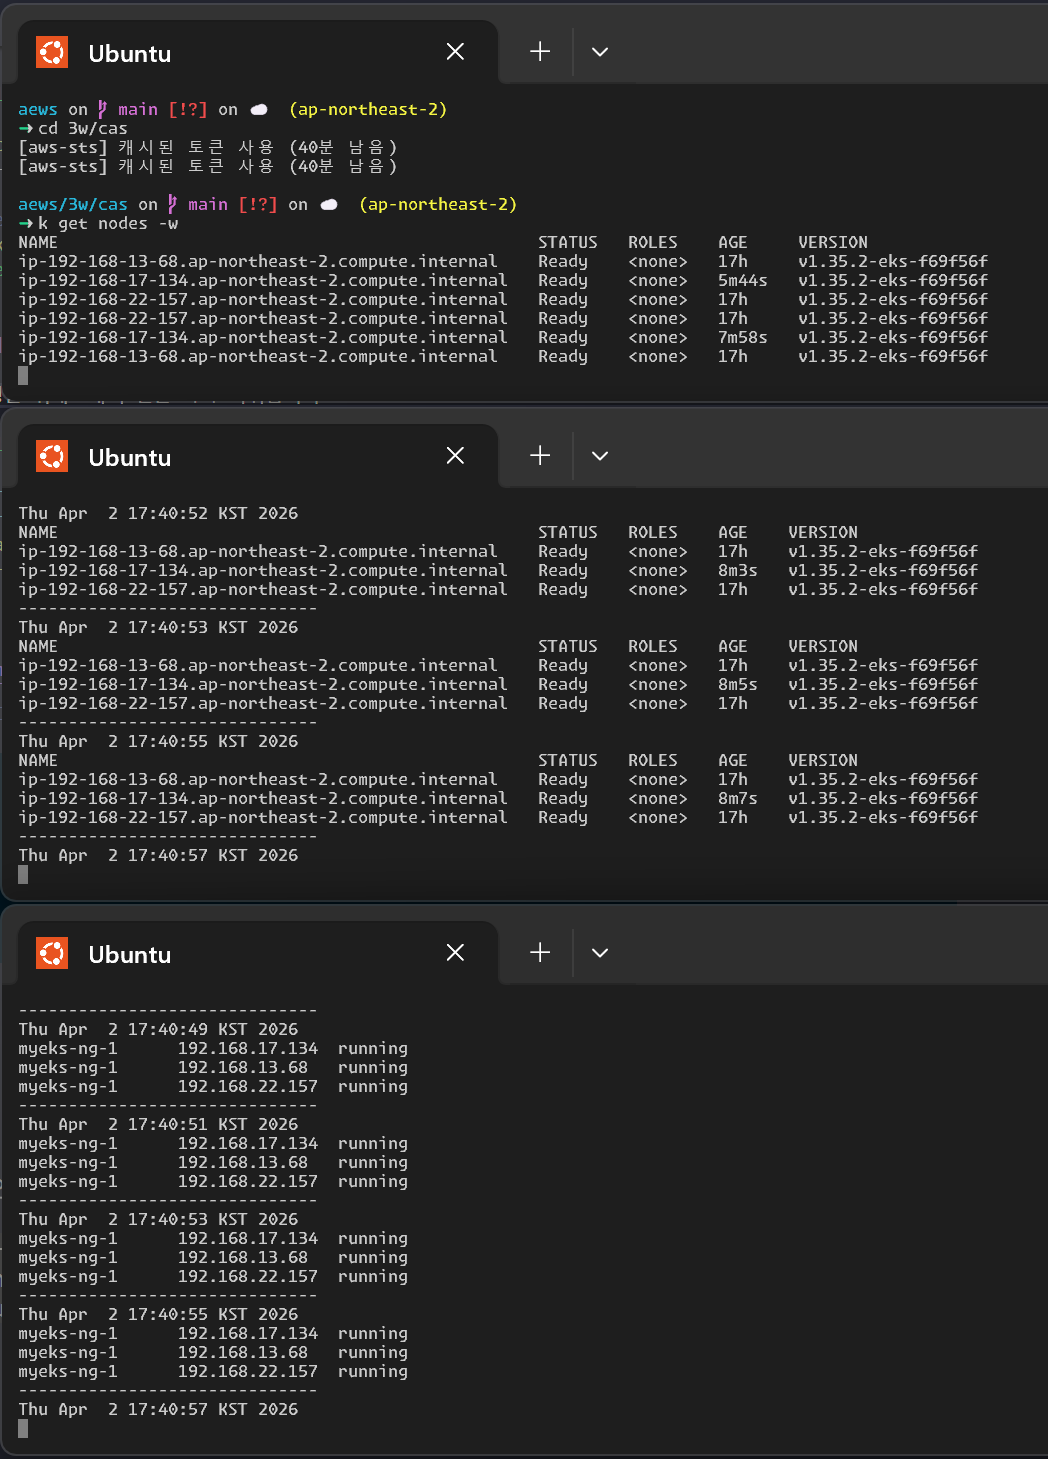
kubectl get nodes -w
while true; do kubectl get node; echo "------------------------------" ; date ; sleep 1; done
while true; do aws ec2 describe-instances --query "Reservations[*].Instances[*].{PrivateIPAdd:PrivateIpAddress,InstanceName:Tags[?Key=='Name']|[0].Value,Status:State.Name}" --filters Name=instance-state-name,Values=running --output text ; echo "------------------------------"; date; sleep 1; done
nginx 앱을 배포하고, 레플리카셋을 늘려봅시다.
$ k apply -f nginx.yaml
deployment.apps/nginx-to-scaleout created

$ k get deployment/nginx-to-scaleout
NAME                READY   UP-TO-DATE   AVAILABLE   AGE
nginx-to-scaleout   1/1     1            1           18m

# 15개로 스케일아웃하고 살펴봅시다.
$ k scale --replicas=15 deployment/nginx-to-scaleout && date
deployment.apps/nginx-to-scaleout scaled
Thu Apr  2 17:59:20 KST 2026

$ kubectl get pods -l app=nginx -o wide --watch
NAME                                READY   STATUS    RESTARTS   AGE   IP               NODE                                                NOMINATED NODE   READINESS GATES
nginx-to-scaleout-9c4489485-2ll8h   0/1     Pending   0          24s   <none>           <none>                                              <none>           <none>
nginx-to-scaleout-9c4489485-5lmpb   0/1     Pending   0          24s   <none>           <none>                                              <none>           <none>
nginx-to-scaleout-9c4489485-6sbhj   0/1     Pending   0          24s   <none>           <none>                                              <none>           <none>
nginx-to-scaleout-9c4489485-9tzz5   0/1     Pending   0          24s   <none>           <none>                                              <none>           <none>
nginx-to-scaleout-9c4489485-bn9fb   1/1     Running   0          24s   192.168.16.131   ip-192-168-17-134.ap-northeast-2.compute.internal   <none>           <none>
nginx-to-scaleout-9c4489485-d47cx   1/1     Running   0          24s   192.168.22.217   ip-192-168-22-157.ap-northeast-2.compute.internal   <none>           <none>
nginx-to-scaleout-9c4489485-f5qx8   1/1     Running   0          24s   192.168.22.91    ip-192-168-22-157.ap-northeast-2.compute.internal   <none>           <none>
nginx-to-scaleout-9c4489485-f7q4x   0/1     Pending   0          24s   <none>           <none>                                              <none>           <none>
nginx-to-scaleout-9c4489485-m5cbp   1/1     Running   0          19m   192.168.17.154   ip-192-168-17-134.ap-northeast-2.compute.internal   <none>           <none>
nginx-to-scaleout-9c4489485-m8txb   1/1     Running   0          24s   192.168.15.101   ip-192-168-13-68.ap-northeast-2.compute.internal    <none>           <none>
nginx-to-scaleout-9c4489485-nbpk6   1/1     Running   0          24s   192.168.22.238   ip-192-168-22-157.ap-northeast-2.compute.internal   <none>           <none>
nginx-to-scaleout-9c4489485-pbhlw   1/1     Running   0          24s   192.168.19.144   ip-192-168-17-134.ap-northeast-2.compute.internal   <none>           <none>
nginx-to-scaleout-9c4489485-qfjs6   1/1     Running   0          24s   192.168.15.226   ip-192-168-13-68.ap-northeast-2.compute.internal    <none>           <none>
nginx-to-scaleout-9c4489485-rs6dq   0/1     Pending   0          24s   <none>           <none>                                              <none>           <none>
nginx-to-scaleout-9c4489485-shbgg   1/1     Running   0          24s   192.168.14.86    ip-192-168-13-68.ap-northeast-2.compute.internal    <none>           <none>
노드 갯수도 늘어나고, 확인이 용이합니다!
$ k get nodes
NAME                                                STATUS   ROLES    AGE   VERSION
ip-192-168-12-126.ap-northeast-2.compute.internal   Ready    <none>   24s   v1.35.2-eks-f69f56f
ip-192-168-13-68.ap-northeast-2.compute.internal    Ready    <none>   17h   v1.35.2-eks-f69f56f
ip-192-168-17-134.ap-northeast-2.compute.internal   Ready    <none>   27m   v1.35.2-eks-f69f56f
ip-192-168-20-164.ap-northeast-2.compute.internal   Ready    <none>   17s   v1.35.2-eks-f69f56f
ip-192-168-22-157.ap-northeast-2.compute.internal   Ready    <none>   17h   v1.35.2-eks-f69f56f

$ eks-node-viewer --resources cpu,memor
5 nodes (     8760m/9650m) 90.8% cpu    ████████████████████████████████████░░░░ $0.208/hour | $151.840/month
        9052Mi/16857200Ki  55.0% memory ██████████████████████░░░░░░░░░░░░░░░░░░
44 pods (0 pending 44 running 44 bound)

ip-192-168-22-157.ap-northeast-2.compute.internal cpu    ██████████████████████████████████░  96% (13 pods) t3.medium/$0.0416 On-Demand - Ready -
                                                  memory █████████████████████░░░░░░░░░░░░░░  61%
ip-192-168-13-68.ap-northeast-2.compute.internal  cpu    ██████████████████████████████████░  96% (12 pods) t3.medium/$0.0416 On-Demand - Ready -
                                                  memory ████████████████████░░░░░░░░░░░░░░░  56%
ip-192-168-17-134.ap-northeast-2.compute.internal cpu    ████████████████████████████████░░░  91% (7 pods)  t3.medium/$0.0416 On-Demand - Ready -
                                                  memory ███████████████████████░░░░░░░░░░░░  65%
ip-192-168-12-126.ap-northeast-2.compute.internal cpu    ██████████████████████████████░░░░░  85% (6 pods)  t3.medium/$0.0416 On-Demand - Ready -
                                                  memory ████████████████░░░░░░░░░░░░░░░░░░░  47%
ip-192-168-20-164.ap-northeast-2.compute.internal cpu    ██████████████████████████████░░░░░  85% (6 pods)  t3.medium/$0.0416 On-Demand - Ready -
                                                  memory ████████████████░░░░░░░░░░░░░░░░░░░  47%
CloudTrail에서 CreateFleet 이벤트를 조회하면, CAS가 ASG를 통해 실제로 EC2를 어떻게 생성했는지 확인할 수 있습니다.
$ aws cloudtrail lookup-events \
  --lookup-attributes AttributeKey=EventName,AttributeValue=CreateFleet \
  --start-time "$(date -d '1 hour ago' --utc +%Y-%m-%dT%H:%M:%SZ)" \
  --end-time "$(date --utc +%Y-%m-%dT%H:%M:%SZ)"
조회 결과에서 핵심 정보를 뽑아보면:
| 시각 (KST) | AZ | 인스턴스 타입 | 용량 타입 | Fleet 유형 |
|---|---|---|---|---|
| 17:32:09 | ap-northeast-2b | t3.medium | On-Demand | instant |
| 17:59:29 | ap-northeast-2a | t3.medium | On-Demand | instant |
| 17:59:29 | ap-northeast-2c | t3.medium | On-Demand | instant |
- ASG가
CreateFleetAPI를instant타입으로 호출하여 즉시 인스턴스를 생성합니다. AllocationStrategy: prioritized로 On-Demand 인스턴스를 우선 할당합니다.- 17:59:29에 2개가 동시에 생성된 것은 replica 15개로 Scale Out했을 때 Pending Pod를 수용하기 위해 노드 2대가 한꺼번에 추가된 것입니다.
- 태그에
k8s.io/cluster-autoscaler/enabled,k8s.io/cluster-autoscaler/myeks가 붙어있어 CAS의 Auto-Discovery 대상임을 확인할 수 있습니다.
디플로이먼트 스케일다운 후 어떻게 되는지 살펴봅시다.
$ k delete -f nginx.yaml && date
deployment.apps "nginx-to-scaleout" deleted from default namespace
Thu Apr  2 18:08:24 KST 2026

Every 2.0s: kubectl get node

NAME                                                STATUS   ROLES    AGE     VERSION
ip-192-168-12-126.ap-northeast-2.compute.internal   Ready    <none>   9m20s   v1.35.2-eks-f69f56f
ip-192-168-13-68.ap-northeast-2.compute.internal    Ready    <none>   18h     v1.35.2-eks-f69f56f
ip-192-168-17-134.ap-northeast-2.compute.internal   Ready    <none>   36m     v1.35.2-eks-f69f56f
ip-192-168-20-164.ap-northeast-2.compute.internal   Ready    <none>   9m13s   v1.35.2-eks-f69f56f
ip-192-168-22-157.ap-northeast-2.compute.internal   Ready    <none>   18h     v1.35.2-eks-f69f56f

# 약 10분 뒤, 스케일다운이 되는 것을 볼 수 있습니다.
Every 2.0s: kubectl get node

NAME                                                STATUS   ROLES    AGE   VERSION
ip-192-168-13-68.ap-northeast-2.compute.internal    Ready    <none>   18h   v1.35.2-eks-f69f56f
ip-192-168-17-134.ap-northeast-2.compute.internal   Ready    <none>   59m   v1.35.2-eks-f69f56f
ip-192-168-22-157.ap-northeast-2.compute.internal   Ready    <none>   18h   v1.35.2-eks-f69f56f
CAS의 한계
실습을 통해 CAS가 동작하는 것을 확인했지만, CAS의 근본적인 문제는 하나의 자원(EC2 노드)을 두 곳(AWS ASG와 EKS)에서 각자의 방식으로 관리한다는 점입니다. 관리 정보가 서로 동기화되지 않아 다양한 문제가 발생합니다.
스케일링 속도
CAS는 Pending Pod 감지 → ASG DesiredCapacity 변경 → ASG가 EC2 CreateFleet 호출 → 인스턴스 부팅 → kubelet 등록 → Pod 스케줄링의 단계를 거칩니다. 이 과정에서 수 분의 지연이 발생하며, 스파이크성 트래픽에 대응하기 어렵습니다. 또한 폴링 방식이라 너무 자주 확인하면 API 스로틀링에 도달할 수 있습니다.
ASG와의 불일치
- EKS에서 노드를 삭제해도 ASG의 인스턴스는 삭제되지 않습니다.
- CAS는 ASG에만 의존하고 노드 생성/삭제에 직접 관여하지 않습니다.
| 제약 | 설명 |
|---|---|
| Node Group 관리 부담 | 인스턴스 타입, AZ, Spot/On-Demand 조합마다 별도 ASG가 필요. 요구사항이 다양해지면 수십 개의 Node Group을 관리해야 합니다. |
| 인스턴스 타입 유연성 부족 | ASG의 Launch Template에 지정된 인스턴스 타입만 사용 가능. Pod의 실제 리소스 요구에 맞는 Right-sizing이 어렵습니다. |
| Bin Packing 비효율 | CAS는 기존 노드에 Pod를 효율적으로 배치하는 것이 아니라, 단순히 노드를 추가/제거합니다. 노드 활용률이 낮아도 축소 조건을 만족하지 않으면 유지됩니다. |
Request 기반 판단의 한계
CAS는 노드 부하가 아니라 Pending Pod 발생 시점에 동작합니다. 이 때문에 Request/Limit 설정이 부적절하면 직관과 다르게 동작합니다.
| 상황 | Request | 실제 사용량 | CAS 동작 |
|---|---|---|---|
| Request를 높게 설정 | 노드가 빨리 꽉 참 | 낮음 | 부하가 낮은데 스케일 아웃 |
| Request를 낮게 설정 | 스케줄링 여유 충분 | Limit까지 치솟음 | 부하가 높은데 스케일 아웃 안 됨 |
Scale In의 어려움
기본 scale-down-unneeded-time이 10분으로, 부하가 줄어도 노드가 즉시 제거되지 않습니다. PDB, local storage, system Pod 등의 조건으로 축소가 막히는 경우도 잦습니다.
- 축소 시 어떤 노드를 제거할지 세밀하게 제어하기 어렵습니다. (Pod가 적은 노드 먼저, 이미 drain된 노드 먼저 등 정도만 가능)
- 특정 노드를 지정 삭제하면서 동시에 노드 수를 줄이기 어렵습니다.
- 예를 들어 100대 중 특정 EC2만 제거하려면: 나머지를 스케일 인 보호 설정 → 삭제 대상 EC2의 Pod 이주 → ASG 조정 → 보호 해제라는 번거로운 과정이 필요합니다.
Karpenter - Just-in-time Nodes for Any Kubernetes Cluster
Karpenter부터는 새로운 실습환경으로 운영 예정입니다. 아래와 같이 실습환경을 정리합시다:
# 실습환경 정리 (1) Prometheus 스택 삭제
$ helm uninstall -n monitoring kube-prometheus-stack
release "kube-prometheus-stack" uninstalled

# (2) kube-ops-view 삭제
k delete ingress -n kube-system kubeopsview
ingress.networking.k8s.io "kubeopsview" deleted from kube-system namespace

$ helm uninstall kube-ops-view --namespace kube-system
release "kube-ops-view" uninstalled

# 3w용으로 프로비전한 리소스를 테라폼으로 삭제
$ tf destroy -auto-approve
Route 53 내용도 개별삭제가 필요합니다. 레코드 및 ACM을 반드시 삭제하시길 바랍니다.
Karpenter란?
오픈소스 노드 수명 주기 관리 솔루션입니다. CAS가 ASG를 거쳐 노드를 관리하는 것과 달리, Karpenter는 EC2 Fleet API를 직접 호출하여 노드를 프로비저닝합니다.
핵심 기능:
- 수초 이내 노드 프로비저닝 — ASG를 거치지 않으므로 Pending → 노드 Ready까지 빠름
- 동적 인스턴스 타입 선택 — Pending Pod의 resource request를 보고 최적의 인스턴스 타입을 자동 선택 (Spot, Graviton 포함)
- Consolidation — 노드 사용률이 낮으면 Pod를 다른 노드로 재배치하고 빈 노드를 제거하거나, 더 작은 인스턴스로 교체
Consolidation 상세
Consolidation은 Karpenter의 핵심 차별점입니다. CAS의 스케일 인이 "빈 노드 제거" 정도에 그치는 반면, Karpenter는 능동적으로 비용을 줄이는 방향으로 노드를 재편합니다.
Consolidation은 3가지 상황을 식별합니다.
- 노드가 비어있어 삭제 가능
- Pod를 다른 노드의 여유 공간으로 옮기면 해당 노드를 삭제 가능
- Pod를 재배치하고 현재 노드를 더 저렴한 노드로 교체 가능
이를 위해 다음 순서로 실행됩니다.
1. Empty Node Consolidation    — 빈 노드 병렬 삭제
   ↓
2. Multi Node Consolidation    — 여러 노드의 Pod를 합치고, 필요 시 더 저렴한 노드 1개로 교체
   ↓
3. Single Node Consolidation   — 단일 노드 삭제 또는 더 저렴한 노드로 교체
예를 들어, m5.2xlarge 3대에 Pod가 조금씩 흩어져 있으면 → Pod를 m5.xlarge 1대로 합쳐서 나머지 2대를 제거하는 식입니다.
설정
NodePool의 spec.disruption에서 설정합니다.
apiVersion: karpenter.sh/v1
kind: NodePool
metadata:
  name: default
spec:
  disruption:
    consolidationPolicy: WhenEmptyOrUnderutilized # 기본값
    consolidateAfter: 0s # Pod 변동 후 대기 시간
| 정책 | 동작 |
|---|---|
WhenEmpty |
빈 노드(DaemonSet 제외)만 삭제 대상 |
WhenEmptyOrUnderutilized |
빈 노드 + 사용률이 낮은 노드 모두 대상 (기본값) |
consolidateAfter는 Pod가 스케줄/제거된 후 Consolidation 판단까지 대기하는 시간입니다. 0s이면 즉시 판단합니다. 잦은 재배치가 부담이면 늘릴 수 있습니다.
Consolidation 불가 사유 확인
Consolidation이 동작하지 않을 때는 이벤트로 이유를 확인할 수 있습니다.
kubectl describe nodeclaim <name>
Events:
  Type    Reason              Message
  Normal  Unconsolidatable    pdb default/my-pdb prevents pod evictions
  Normal  Unconsolidatable    can't replace with a lower-priced node
PDB(PodDisruptionBudget)가 eviction을 막거나, 이미 최저가 노드인 경우 등이 흔한 사유입니다.
Spot 노드는 기본적으로 삭제만 가능하고, 다른 Spot으로의 교체는 SpotToSpotConsolidation feature flag를 켜야 합니다. 교체 시에는 최소 15개 이상의 인스턴스 타입을 NodePool에 허용해야 합니다.
CAS vs Karpenter
| CAS | Karpenter | |
|---|---|---|
| 노드 프로비저닝 | ASG → EC2 (간접) | EC2 Fleet API (직접) |
| 인스턴스 타입 | ASG에 미리 정의된 타입만 | Pod 요구사항에 맞춰 동적 선택 |
| 스케일링 속도 | 수 분 | 수 초 |
| 스케일 인 | 저사용률 노드 제거 (제어 어려움) | Consolidation으로 자동 재배치 + 제거/교체 |
| Spot 처리 | ASG 설정에 의존 | 중단 시 자동 대체 인스턴스 프로비저닝 |
| 관리 대상 | ASG (노드 그룹) | NodePool + EC2NodeClass (Karpenter CRD) |
실습
본 가이드는 2026년 3월 26일 (목) 기준 Karpernter의 Getting Started 을 따라서 처리합니다.
환경변수 설정
# 변수 설정
export USER=s3ich4n

export KARPENTER_NAMESPACE="kube-system"
export KARPENTER_VERSION="1.10.0"
export K8S_VERSION="1.34"

export AWS_PARTITION="aws" # if you are not using standard partitions, you may need to configure to aws-cn / aws-us-gov
export CLUSTER_NAME="${USER}-karpenter-demo"
export AWS_DEFAULT_REGION="us-west-2"
export AWS_ACCOUNT_ID="$(aws sts get-caller-identity --query Account --output text)"
export TEMPOUT="$(mktemp)"
export ALIAS_VERSION="$(aws ssm get-parameter --name "/aws/service/eks/optimized-ami/${K8S_VERSION}/amazon-linux-2023/x86_64/standard/recommended/image_id" --query Parameter.Value | xargs aws ec2 describe-images --query 'Images[0].Name' --image-ids | sed -r 's/^.*(v[[:digit:]]+).*$/\1/')"
잘 반영되어있나 꼭 확인해봅시다.
echo "${KARPENTER_NAMESPACE}" "${KARPENTER_VERSION}" "${K8S_VERSION}" "${CLUSTER_NAME}" "${AWS_DEFAULT_REGION}" "${AWS_ACCOUNT_ID}" "${TEMPOUT}" "${ALIAS_VERSION}"
배포하기
정책 배포하기
# CloudFormation 스택으로 IAM Policy/Role, SQS, Event/Rule 생성
curl -fsSL https://raw.githubusercontent.com/aws/karpenter-provider-aws/v"${KARPENTER_VERSION}"/website/content/en/preview/getting-started/getting-started-with-karpenter/cloudformation.yaml  > "${TEMPOUT}" \
&& aws cloudformation deploy \
  --stack-name "Karpenter-${CLUSTER_NAME}" \
  --template-file "${TEMPOUT}" \
  --capabilities CAPABILITY_NAMED_IAM \
  --parameter-overrides "ClusterName=${CLUSTER_NAME}"

Waiting for changeset to be created..
Waiting for stack create/update to complete
Successfully created/updated stack - Karpenter-s3ich4n-karpenter-demo
클러스터 배포하기
환경변수로 인해 이대로 create을 바로 진행합니다.
eksctl create cluster -f - <<EOF
---
apiVersion: eksctl.io/v1alpha5
kind: ClusterConfig
metadata:
  name: ${CLUSTER_NAME}
  region: ${AWS_DEFAULT_REGION}
  version: "${K8S_VERSION}"
  tags:
    karpenter.sh/discovery: ${CLUSTER_NAME}

iam:
  withOIDC: true
  podIdentityAssociations:
  - namespace: "${KARPENTER_NAMESPACE}"
    serviceAccountName: karpenter
    roleName: ${CLUSTER_NAME}-karpenter
    permissionPolicyARNs:
    - arn:${AWS_PARTITION}:iam::${AWS_ACCOUNT_ID}:policy/KarpenterControllerNodeLifecyclePolicy-${CLUSTER_NAME}
    - arn:${AWS_PARTITION}:iam::${AWS_ACCOUNT_ID}:policy/KarpenterControllerIAMIntegrationPolicy-${CLUSTER_NAME}
    - arn:${AWS_PARTITION}:iam::${AWS_ACCOUNT_ID}:policy/KarpenterControllerEKSIntegrationPolicy-${CLUSTER_NAME}
    - arn:${AWS_PARTITION}:iam::${AWS_ACCOUNT_ID}:policy/KarpenterControllerInterruptionPolicy-${CLUSTER_NAME}
    - arn:${AWS_PARTITION}:iam::${AWS_ACCOUNT_ID}:policy/KarpenterControllerResourceDiscoveryPolicy-${CLUSTER_NAME}

iamIdentityMappings:
- arn: "arn:${AWS_PARTITION}:iam::${AWS_ACCOUNT_ID}:role/KarpenterNodeRole-${CLUSTER_NAME}"
  username: system:node:{{EC2PrivateDNSName}}
  groups:
  - system:bootstrappers
  - system:nodes
  ## If you intend to run Windows workloads, the kube-proxy group should be specified.
  # For more information, see https://github.com/aws/karpenter/issues/5099.
  # - eks:kube-proxy-windows

managedNodeGroups:
- instanceType: m5.large
  amiFamily: AmazonLinux2023
  name: ${CLUSTER_NAME}-ng
  desiredCapacity: 2
  minSize: 1
  maxSize: 10

addons:
- name: eks-pod-identity-agent
EOF

2026-04-02 19:18:09 [ℹ]  eksctl version 0.224.0
2026-04-02 19:18:09 [ℹ]  using region us-west-2
2026-04-02 19:18:10 [ℹ]  setting availability zones to [us-west-2b us-west-2d us-west-2c]
2026-04-02 19:18:10 [ℹ]  subnets for us-west-2b - public:192.168.0.0/19 private:192.168.96.0/19
2026-04-02 19:18:10 [ℹ]  subnets for us-west-2d - public:192.168.32.0/19 private:192.168.128.0/19
2026-04-02 19:18:10 [ℹ]  subnets for us-west-2c - public:192.168.64.0/19 private:192.168.160.0/19
2026-04-02 19:18:10 [ℹ]  nodegroup "s3ich4n-karpenter-demo-ng" will use "" [AmazonLinux2023/1.34]
2026-04-02 19:18:10 [!]  Auto Mode will be enabled by default in an upcoming release of eksctl. This means managed node groups and managed networking add-ons will no longer be created by default. To maintain current behavior, explicitly set 'autoModeConfig.enabled: false' in your cluster configuration. Learn more: https://eksctl.io/usage/auto-mode/
2026-04-02 19:18:10 [ℹ]  using Kubernetes version 1.34
...

배포중...
$ eksctl get cluster
NAME                    REGION          EKSCTL CREATED
s3ich4n-karpenter-demo  us-west-2       True

$ eksctl get nodegroup --cluster $CLUSTER_NAME

CLUSTER                 NODEGROUP                       STATUS  CREATED                 MIN SIZE        MAX SIZE        DESIRED CAPACITY        INSTANCE TYPE   IMAGE IDASG NAME                                                         TYPE
s3ich4n-karpenter-demo  s3ich4n-karpenter-demo-ng       ACTIVE  2026-04-02T10:30:16Z    1               10              2                       m5.large        AL2023_x86_64_STANDARD   eks-s3ich4n-karpenter-demo-ng-04cea6df-2dcf-14c0-4c97-44894267f063      managed
[aws-sts] 캐시된 토큰 사용 (49분 남음)

$ eksctl get iamidentitymapping --cluster $CLUSTER_NAME

ARN                                                                                             USERNAME                                GROUPS                          ACCOUNT
arn:aws:iam::240962124292:role/KarpenterNodeRole-s3ich4n-karpenter-demo                         system:node:{{EC2PrivateDNSName}}       system:bootstrappers,system:nodes
arn:aws:iam::240962124292:role/eksctl-s3ich4n-karpenter-demo-node-NodeInstanceRole-TF12rNs4rSgu system:node:{{EC2PrivateDNSName}}       system:bootstrappers,system:nodes

$ eksctl get iamserviceaccount --cluster $CLUSTER_NAME

No iamserviceaccounts found

$ eksctl get addon --cluster $CLUSTER_NAME
2026-04-02 19:43:23 [ℹ]  Kubernetes version "1.34" in use by cluster "s3ich4n-karpenter-demo"
2026-04-02 19:43:23 [ℹ]  getting all addons
2026-04-02 19:43:26 [ℹ]  to see issues for an addon run `eksctl get addon --name <addon-name> --cluster <cluster-name>`
NAME                    VERSION                 STATUS  ISSUES  IAMROLE                                                                                         UPDATE AVAILABLE                                                                                                                                         CONFIGURATION VALUES    NAMESPACE        POD IDENTITY ASSOCIATION ROLES
coredns                 v1.12.3-eksbuild.1      ACTIVE  0                                                                                                       v1.13.2-eksbuild.4,v1.13.2-eksbuild.3,v1.13.2-eksbuild.1,v1.13.1-eksbuild.1,v1.12.4-eksbuild.11,v1.12.4-eksbuild.10,v1.12.4-eksbuild.6,v1.12.4-eksbuild.1                        kube-system
eks-pod-identity-agent  v1.3.10-eksbuild.2      ACTIVE  0                                                                                                               kube-system
kube-proxy              v1.34.0-eksbuild.2      ACTIVE  0                                                                                                       v1.34.6-eksbuild.2,v1.34.5-eksbuild.2,v1.34.3-eksbuild.5,v1.34.3-eksbuild.2,v1.34.1-eksbuild.2,v1.34.0-eksbuild.4                                                                kube-system
vpc-cni                 v1.20.4-eksbuild.2      ACTIVE  0       arn:aws:iam::240962124292:role/eksctl-s3ich4n-karpenter-demo-addon-vpc-cni-Role1-a9A2t0HWOgHv   v1.21.1-eksbuild.7,v1.21.1-eksbuild.5,v1.21.1-eksbuild.3,v1.21.1-eksbuild.1,v1.21.0-eksbuild.4,v1.20.5-eksbuild.1,v1.20.4-eksbuild.3                                             kube-system